I2C Module Experiment on EK-TM4C123GXL

I played with I2C modules on EK-TM4C123GXL. One I2C module (I2C0) is set up as I2C slave. Another I2C module (I2C1) is set up as I2C master for debugging. UART is also used to communicate with PC.

You can download my project files from here.

Here's the block diagram.
The register, created on memory, stores 128 of 8-bit values. I2C master can read/write the registers via I2C bus.

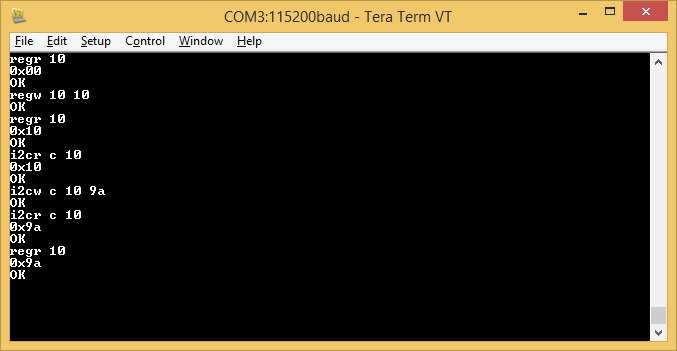
You may manipulate the registers via terminal (Virtual COM port on USB-UART) using commands regr and regw. When the command is executed successfully, the message "OK" is returned.
regr [register address]
regw [register address] [value to be written]
 Also, you may use I2C master using command i2cr and i2cw.
i2cr [slave address] [register address]
i2cw [slave address] [register address] [value to be written]
Default slave address in my code is 0x0c. When the command is executed successfully, the message "OK" is returned.

This is an sample operation with I2C1 master module.


Try using low price LCD TD-T14ST2G2360-5


TD-T14ST2G2360-5 is a low price LCD module sold here. It has 128 x 128 pixels display. I tried using the LCD with Tiva LaunchPad EK-TM4C123GXL.

Generic Device Driver

I developed device driver easily adoptable to your preferred MCU. The source codes are available on the website below. Currently you can draw major ascii characters, lines, and rectangles with the driver.

Device Driver : source codes

Implementation Example for EK-TM4C123GXL

Let's see an example implemented on EK-EM4C123GXL. Electrical connection is shown in the picture below.


Project files for Code Composer Studio (CCS) is downloadable from here.

To import the project, launch CCS, then select the item
Projects > Import Existing CCS Eclipse Projects


Check the LCD_TEST project and click the Finish button.

To build the project, import driverlib too.

Launch a web server using Raspberry Pi

It was easy to launch a web server with Raspberry Pi.

sudo apt-get update
sudo apt-get install apache2

After the installation, the web server automatically runs up. You might see the following message.

Setting up apache2-mpm-worker (2.2.22-13) ...
[....] Starting web server: apache2apache2: Could not reliably determine the server's fully qualified domain name, using 127.0.1.1 for ServerName
. ok
Setting up apache2 (2.2.22-13) ...
Setting up ssl-cert (1.0.32) ...

If you feel uncomfortable with this message, create a file in following way.

echo "ServerName localhost" | tee /etc/apache2/conf.d/fqdn
Then restart the web server.

sudo /etc/init.d/apache2 restart

Accessing your raspberry pi via your web browser, you will see the following message.


You can change the content by editing /var/www/index.html. Enjoy!

Reference:

[AKM Chip Booster] Audio ADC AK5704 PCB Design

Designing a PCB prototype with AK5704 is not so difficult and I show an example with my design. People who are not familiar with AK5704,...